
Here's a little scarf I dreamed up yesterday. Its twisting chains remind me of green beans clustered on the vine, and the flowers interspersed are of course the bean blossoms. (It also reminded me of asparagus roots, but that doesn't make such a nice pattern name.)

This pattern is super-easy, super-quick, and offers lots of potential for variations. As usual, the charted pattern comes first (very hastily sketched), then the shorthand instructions, then the tutorial with instructions in plain English. Use any yarn you like with the appropriate-sized hook. My scarf was made with Naturally Caron Spa and hook size I.
 |
| Beginning ring and loops |
 |
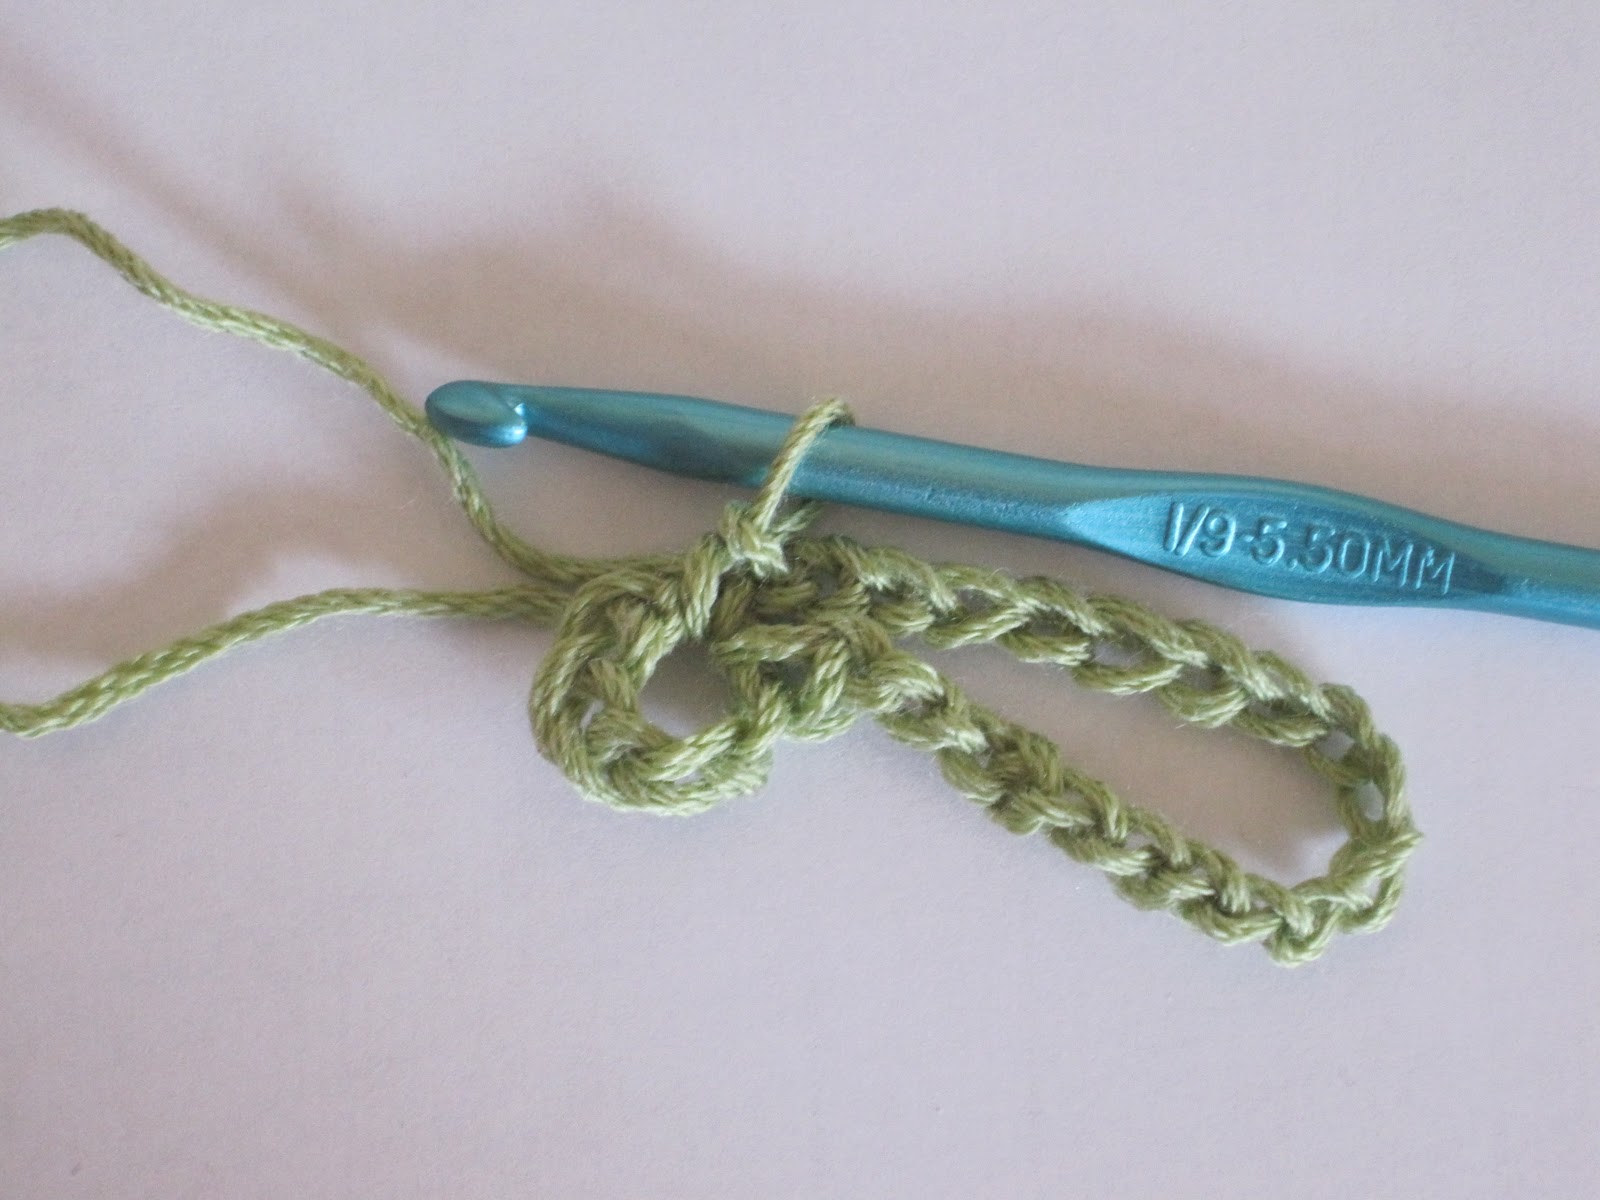
| Join loops with sc, make new ring. |
 |
| Showing one side border and one end done. |
Shorthand Instructions:
Ch 6. Join with sl st to form ring.
Ch 1, sc in ring. *Ch 20, sc in ring (2 times). Ch 11. Join with sc in top of ch-20 loops to form cluster.
Ch 3. DC in joining sc to form ring. Ch 1, TURN, sc 1.
Repeat from * until scarf is as long as you like.
To make end ring, ch 6 and join with sl st to sc.
**Ch 11. SC 2, ch 4, sc 2, ch 4, sc 2 in next ring.
Repeat from ** up to ring just before other end of scarf. Ch 11.
In end ring, SC 2, ch 4 (5 times) in end ring. SC 2.
Repeat from ** up other side of scarf until you reach the end ring. SC 2/ch 4 as with first end ring (5 times), ending with sc 2.
Attach with sl st to sc at base. Weave in ends. Wear!
Starting Ring
Chain 6. Join with slip stitch to form ring. Chain 1 and make single crochet in ring:

Strands and Rings
Chain 20, loop back down, and join to ring with single crochet:
Chain 20 again, loop back, join to ring with single crochet (look like bunny ears, don't they? I think I'll call them that):

Chain 11:

Join bunny ears with a single crochet. (Put hook through top of the 2 bunny ears just made, yarn over, and pull through. You should now have 2 loops on your hook. Yarn over again, and pull through both loops on hook.)


Chain 3, and make a double crochet in the single crochet you just made to form a new ring:


Chain 1, TURN, and make single crochet in ring:

Now you're ready to chain 20 and make your next set of strands (or bunny ears). See how quick it is? Keep making strands and rings until the scarf is as long as you like.
Ending Ring
For the final ring, chain 6 and join with slip stitch in single crochet at base of ring. Now you're ready to go back around and make the side strands and blossoms.

Side strands and Blossoms
Chain 11:

Join to next ring: single crochet 2/chain 4, single crochet 2/chain 4, single crochet 2:

You may have to scooch the stitches over to the right to make them all fit.

The ring should look like this, with 2 petals sticking out:

Repeat the above step, all the way down one side of the scarf, ending with chain 11 at the the starting ring. To make the end blossom, single crochet 2/chain 4 around the ring until you have 5 petals, ending with 2 single crochets. It should look like this:

Now you're ready to go back up the other side of the scarf. Follow the
"Side Strands and Blossoms" steps above...

...until you get to the ending ring. Make another end blossom, join with slip stitch, and you're done!

Hide those yarn ends, fling your new bean blossom scarf around your neck (or the nearest vase), and head outside to make the most of spring.

Ideas for Variations:
~Make 2 or 3 scarves and join them at the blossom sections. I hope to post an example of this soon.
~Lengthen or shorten the chain strands. Just make sure you use an even number of chains for the long loops, and half that number + 1 for the side chains.
~Make the flower rings longer/taller, and add more petals.
~Make crocheted flowers to stick through the blossom holes, turning the petals into leaves.
~Make several scarves in different colours and wear them together.
You may do whatever you like with items you make from this pattern, but you may not sell the pattern. (Thanks to Snowcatcher for that handy phrase. Crocheters and cyclists everywhere should check out her stunningly beautiful blog.)
I love this pattern and am working on a variegated one. It is quick, easy and unique.
ReplyDeleteVicky and Karen - thank you so much!
ReplyDeleteKaren - be sure to post a picture of your scarf on Ravelry. I was wondering how it might look in variegated yarn and I'd love to see yours.
I cannot thank you enough for this wonderful pattern! I really needed a summer scarf for my sister in law to be, and this was absolutely perfect! Your instructions are unbelievably clear and easy to follow, it made making this scarf such a joy. It is so wonderful that you post your patterns like this for others to share, because while I can follow directions well (I'm in charge of all the Lego sets around here, and I just put a basketball hoop together) I just could never ever come up with a pattern like this on my own. Thank you again for sharing your talent!
ReplyDeleteYou're very welcome, Janice! I'm so glad you liked it.
ReplyDeleteI LOVE the way you photograph your examples. They are clear and the lighting is wonderful.
ReplyDeleteHow do you ever think of these beautiful scarfs?
How does a person put directions into symbols or
how do you start?
Thanks Juanita. I don't know how I think of them. This one just popped into my head. Other designs come from playing around with the yarn.
ReplyDeleteThe symbols are standard crochet chart symbols. I learned them years ago from a reading a magazine called "Magic Crochet". Here's one website that explains the symbols:
http://www.craftyarncouncil.com/chart_crochet.html
I thought this one was going to be difficult so I set aside an entire weekend to get it done. Less than ninety minutes later I had seven feet of beautiful bean flower scarf. Lovely and easy. Two of my favorite things.
ReplyDeleteSo glad it was quick for you and you liked the result! Post a picture on Ravelry if you can. I'd love to see it.
ReplyDeleteneat! i like the green, too and the name suits it so well. love, love your scarves. wish that i had that kind of creativity. :)
ReplyDeleteThanks so much!
ReplyDeleteI made this scarf in about two hours and absolutely love it! I knit it in a sunny yellow.
ReplyDeleteSo glad! If you're a Ravelry member, post a pic. I'd love to see it.
ReplyDeleteI made this beautiful scarf in no time!! It is gorgeous and fun to crochet! Thanks!!
ReplyDeleteSo glad you liked it! Post a picture on Ravelry if you belong. I'd love to see it. :)
ReplyDeleteLove your scarf patterns and tutorial. Also love your profile. Our dream was to live in Italy or England and it has come true; we've been in Florence for 15 months and counting.
ReplyDeleteWow, Linda! My sister went to Italy last year and said she immediately felt at home. She can't wait to go back. How lucky to be living your dream in such a beautiful place.
ReplyDeleteAnd thanks.
Love this pattern! Thanks for sharing!
ReplyDeleteThis is amazingly fun! As in, amazing AND fun :)
ReplyDeleteThanks so much for sharing your creation and for being a part of Ravelry, because that is how I found you in the first place!
Thanks Again!
Heather
Did you ever do it with 2 or 3 together? I'm making it right now and was wondering how it might look.
ReplyDeleteNaomi - I did make one half-hearted attempt a long time ago - a swatch with just a few segments. It didn't quite work as well as I thought it would (which is why I never posted any pictures). Perhaps if you made only 2 petals per side of the flower? Someone on Ravelry made the Bean Blossom into an infinity scarf by joining the ends - I think that was an even better idea. Good luck with yours, and be sure to post a pic on Ravelry if you belong.
DeleteI went with an infinity version as well. Thanks for sharing your pattern! You have really great instructions. Here is a link(I hope) to mine.
Deletehttps://fbcdn-sphotos-a.akamaihd.net/hphotos-ak-ash4/418216_260702050668230_235596843178751_665812_1690581183_n.jpg
Looks great! I love the pink - very spring-y.
DeleteThanks so much for this pattern. It's easy to understand without complicated stitches! I'm left handed and at a stand still after staring back up the side. Are the petals made with 2 on one side and two on the other? If so, do you make two, move on down, then do two more on the way back up? It just doesn't look right when I get ready to move to the next ring. I appreciate your help!
ReplyDeleteYes - you make the 2 petals (sc, ch 4, sc, ch 4, sc) on one side of the hole only, then chain 11 and attach to the next hole down with another single crochet, which starts the next set of petals.
DeleteSo you work all down one side of the scarf - petals, chain 11, petals, chain 11, till you reach the end. Make petals around the end hole, then work back up the other side - chain 11 between holes, make petals in the holes. Hope this helps! (Please feel free to ask again if I haven't made it clear.)
As a complete beginner in crochet, I've decided to try this scarf, it's so beautiful, I just have to make it! I'm a self taught knitter, and learnt by following patterns that I loved, and ones that I was passionate about (I prevailed after much ado) so I am hoping that I will do as well with this scarf as well! Thank you so much for sharing! <3
ReplyDeleteI'm making a shawl with this pattern, joining each strip as I crochet the second and subsequent ones. The first strip has 20 blossoms (I'm tall), and each subsequent strip has two blossoms less than the one directly above it.
ReplyDeleteI made my blossoms with 4 petals of 5-ch loops, with 7 loops on each end blossom.
Joining: As I work the strips, I made one edge of blossoms then started joining on the end blossom, using the flat braid joining method. Instead of chain 11, I'm working (chain 5, join in previous ch-11 space, chain 5) between the blossoms.
Wow, Melissa, this sounds amazing. If you belong to Ravelry be sure to post a picture. I'd love to see it when it's done. Thanks for commenting!
DeleteI do and I will. I'm CatsCradle at Ravelry. :D
DeleteI love this! Great tutorial too! I featured a link to the pattern on my blog this morning! :) http://www.mooglyblog.com/crochet-summer-scarves/
ReplyDeleteThank you for sharing your pattern!
Thanks Tamara! It's always an honour to be featured on Moogly. :)
DeleteI love how it looks! Wanna try this!
ReplyDeleteLove this! SO easy!!
ReplyDelete