
In self-defense, and as an excuse to play with yarn, I decided we needed some really colourful ties that he couldn't possibly miss - lacy, cheerfully orange ties that would look pretty against the muslin summer curtains, and show up well if they happened to fall on the floor or into the paper-recycling can. A little time with the yarn and hook, a few

Operation Colourful Curtain Ties was a rousing success. Our new ties survived the rest of Summer 2013, and were safely put away with the muslin curtains when cold weather came. Now summer is here once more, and the ties are back in action.
I think they'll be good for a few summers yet.

~ ~ ~
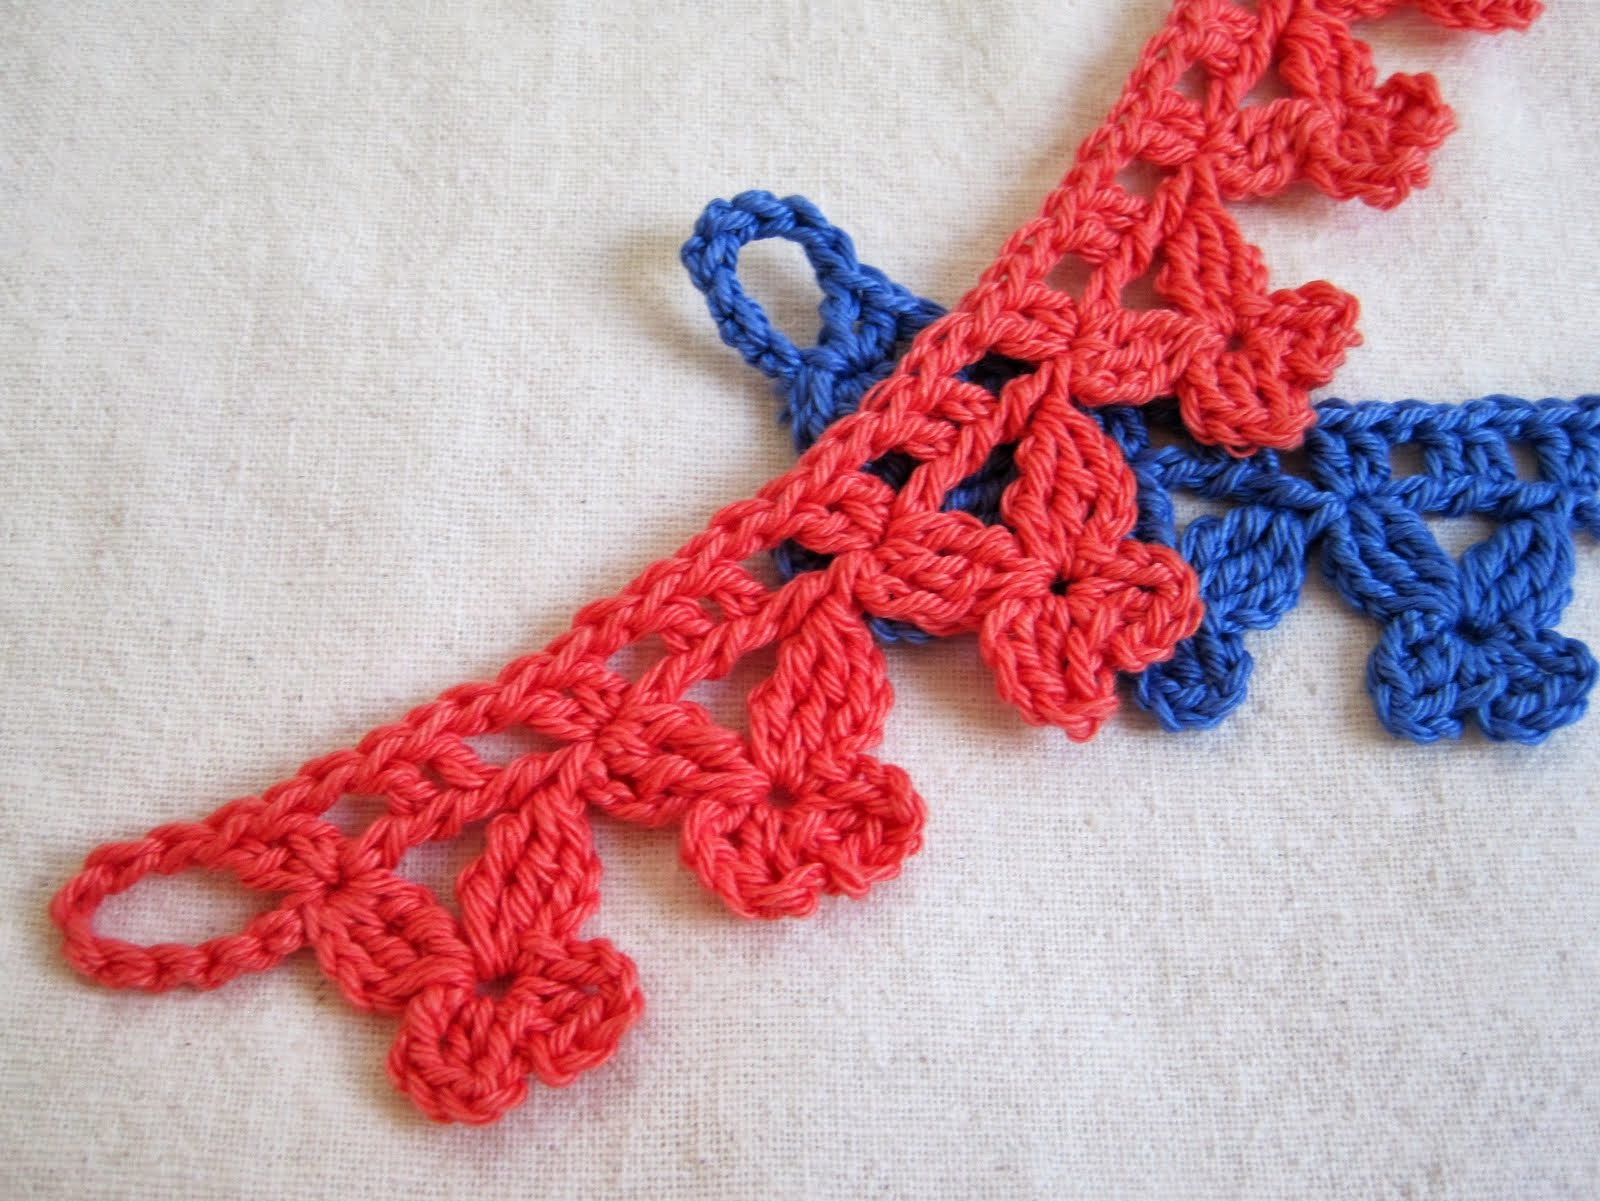
Flutter-By Curtain Ties
Size: 1½" wide by as long as you like - mine have 12 Flutter-Bys and are about 18" long
Yarn Requirements: 40-50 yards of DK weight yarn will make (2) 18" ties
Yarn I Used: Planet Penny Cotton Club
How Did the Yarn Behave? Great as always!
Hook Size: D/3.25mm or E/3.5mm
All crochet terminology is American.
Special Stitches/Abbreviations:
Knotless Chain (optional): click here for phototutorial
Forward Loop Chain (forlp ch): click here for written/phototutorial; click here for video tutorial. (You may substitute regular chain stitches for the forward loop chain sections, but they will look thinner and be slightly less sturdy.)
Double Treble (dtr): yarn over 3 times, insert hook in indicated space, yarn over and pull up a loop, (yarn over and draw through 2 loops) 4 times.
Invisible Join (optional): click here for tutorial; you may substitute a plain slip stitch join.
Flutter-By Ties Crochet Chart

Flutter-By Ties Crochet Shorthand Pattern
Ties are worked RS facing at all times.
*Knotless ch (or regular chain) 4, tr2tog in back ridge of 4th ch from hook (top left wing made); ch 4, dc in back ridge of 4th ch from hook, ch 3, sl st in same back ridge sp (lower left wing made); ch 3, dc in same back ridge sp, ch 3, sl st in same back ridge sp (lower right wing made); ch 3, tr2tog in same back ridge sp (upper right wing made); dtr in back ridge sp of starting ch (at top of upper left wing); first flutter-by complete.
Rep from * to desired length of tie.
End loop: Forlp ch 8.
Top edging: Dc 2 in back ridge of 8th forlp ch from hook; *forlp ch 1, sk top segment of dtr, (dc in back ridge of next segment) twice; forlp ch 1, dc 2 in sp at top of next left upper wing. Rep from * across.
End loop: Forlp ch 8, inv join to starting ch.
Flutter-By Ties Phototutorial with Pattern in Plain English
Making a Flutter-By:
Knotless chain (or regular chain) 4:

Find the back ridge of the first chain you made; you will be making your next stitches into it.
Treble crochet 2 together in the space under that back ridge.
(To treble crochet 2 together, yarn over 2 times;
insert hook under back ridge, yarn over and pull up a loop,
yarn over and pull through 2 loops,
yarn over and pull through 2 loops;
with 2 loops still on hook, yarn over 2 times,
insert hook under same back ridge, yarn over and pull up a loop,
yarn over and pull through 2 loops,
yarn over and pull through 2 loops;
yarn over and pull through all 3 loops on hook.)
You've made the first wing of your Flutter-By:

Chain 4, and find the back ridge of the 4th chain from the hook (this back ridge will form the center of the Flutter-By; all the rest of the wings will be stitched into this space):
Double crochet 1 in that back ridge:
Chain 3, and slip stitch in the same back ridge space (lower left wing now complete):
Chain 3,
double crochet in the same back ridge space,
chain 3,
slip stitch in the same back ridge space.
Your lower right wing is now complete:

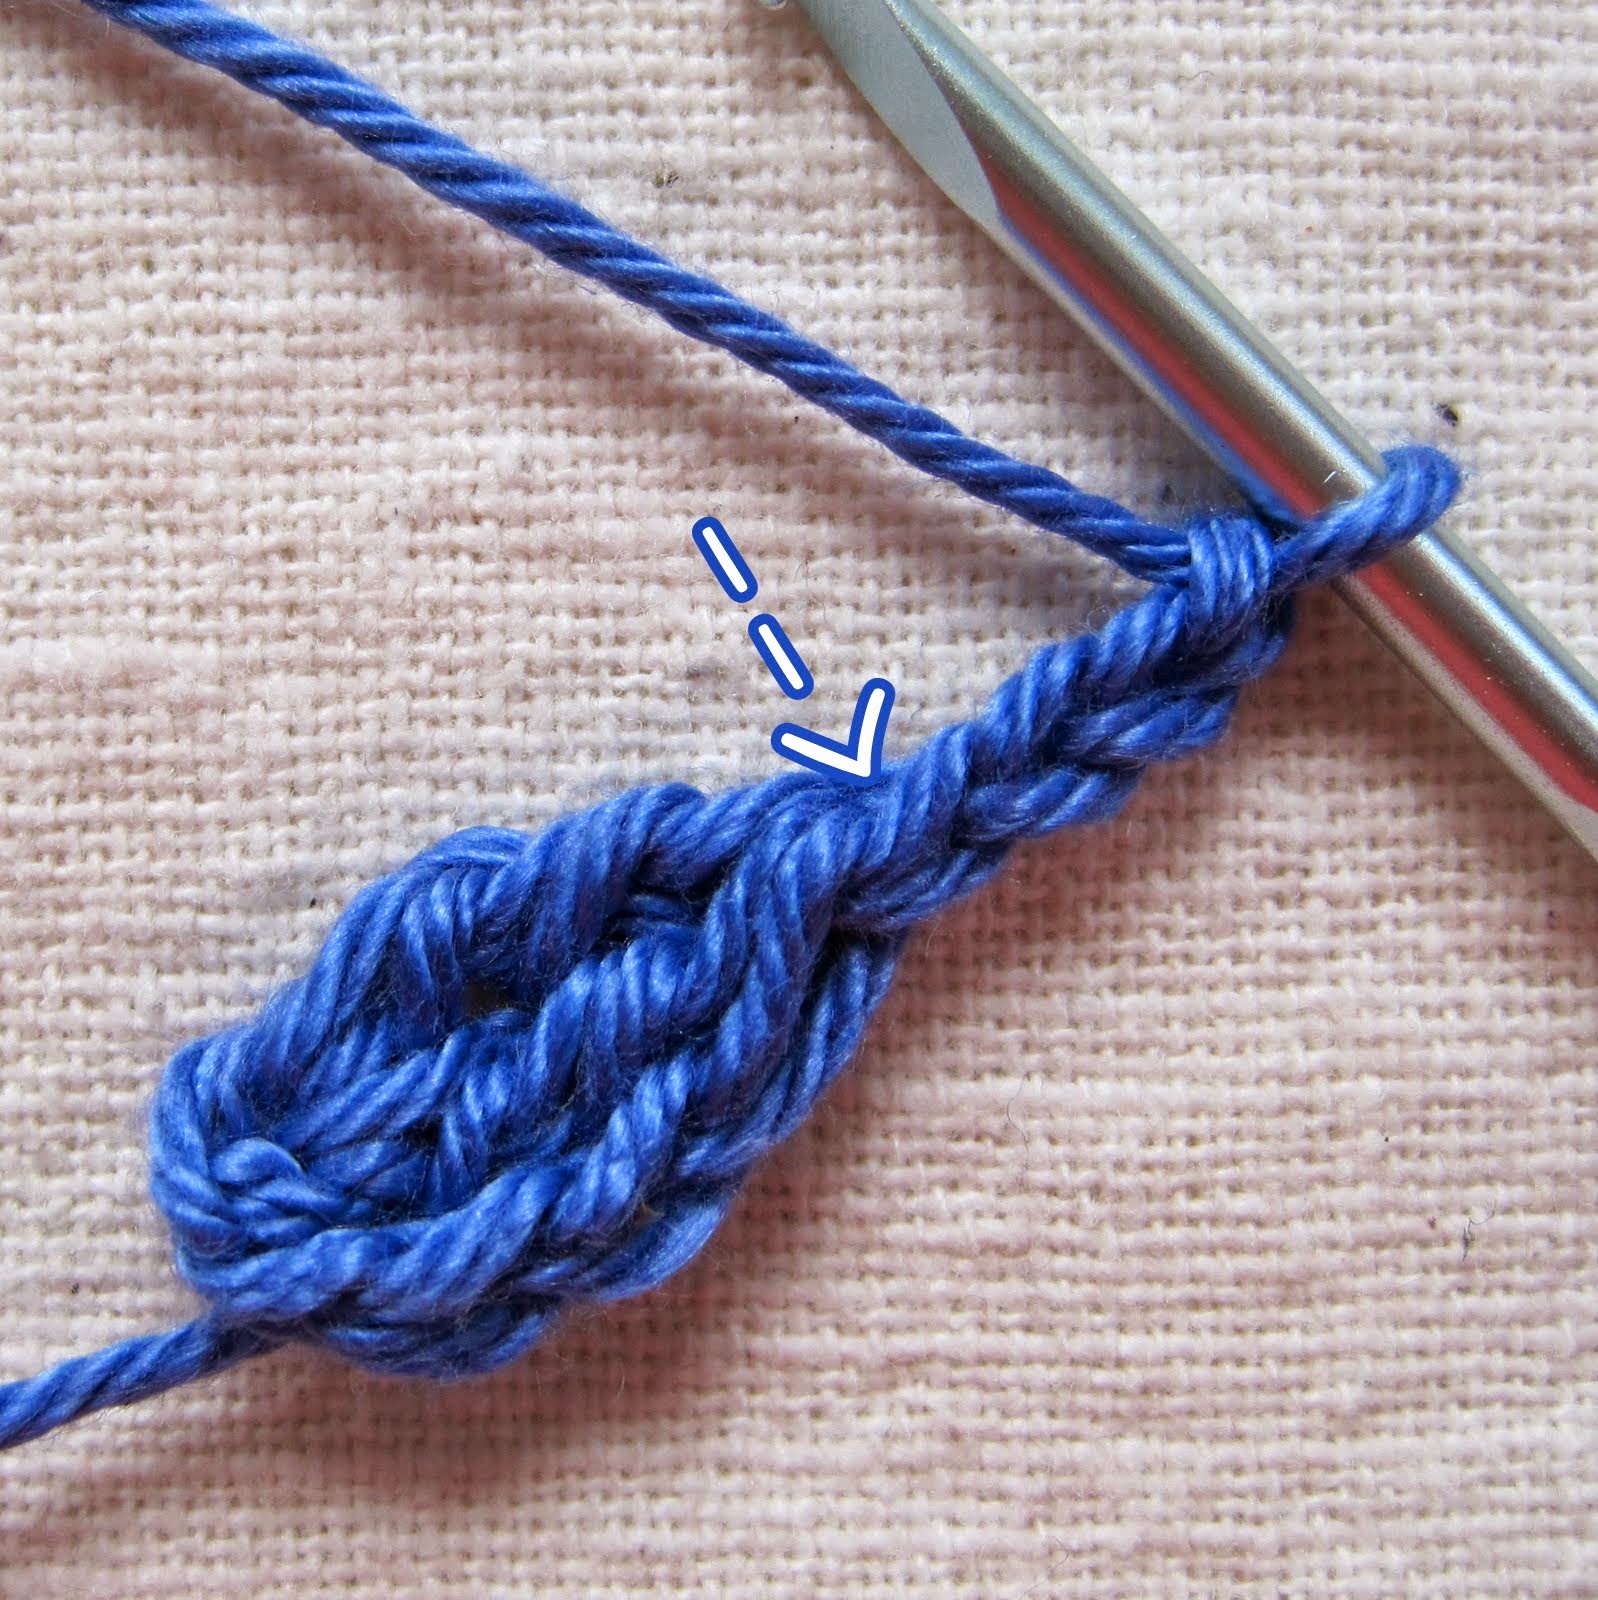
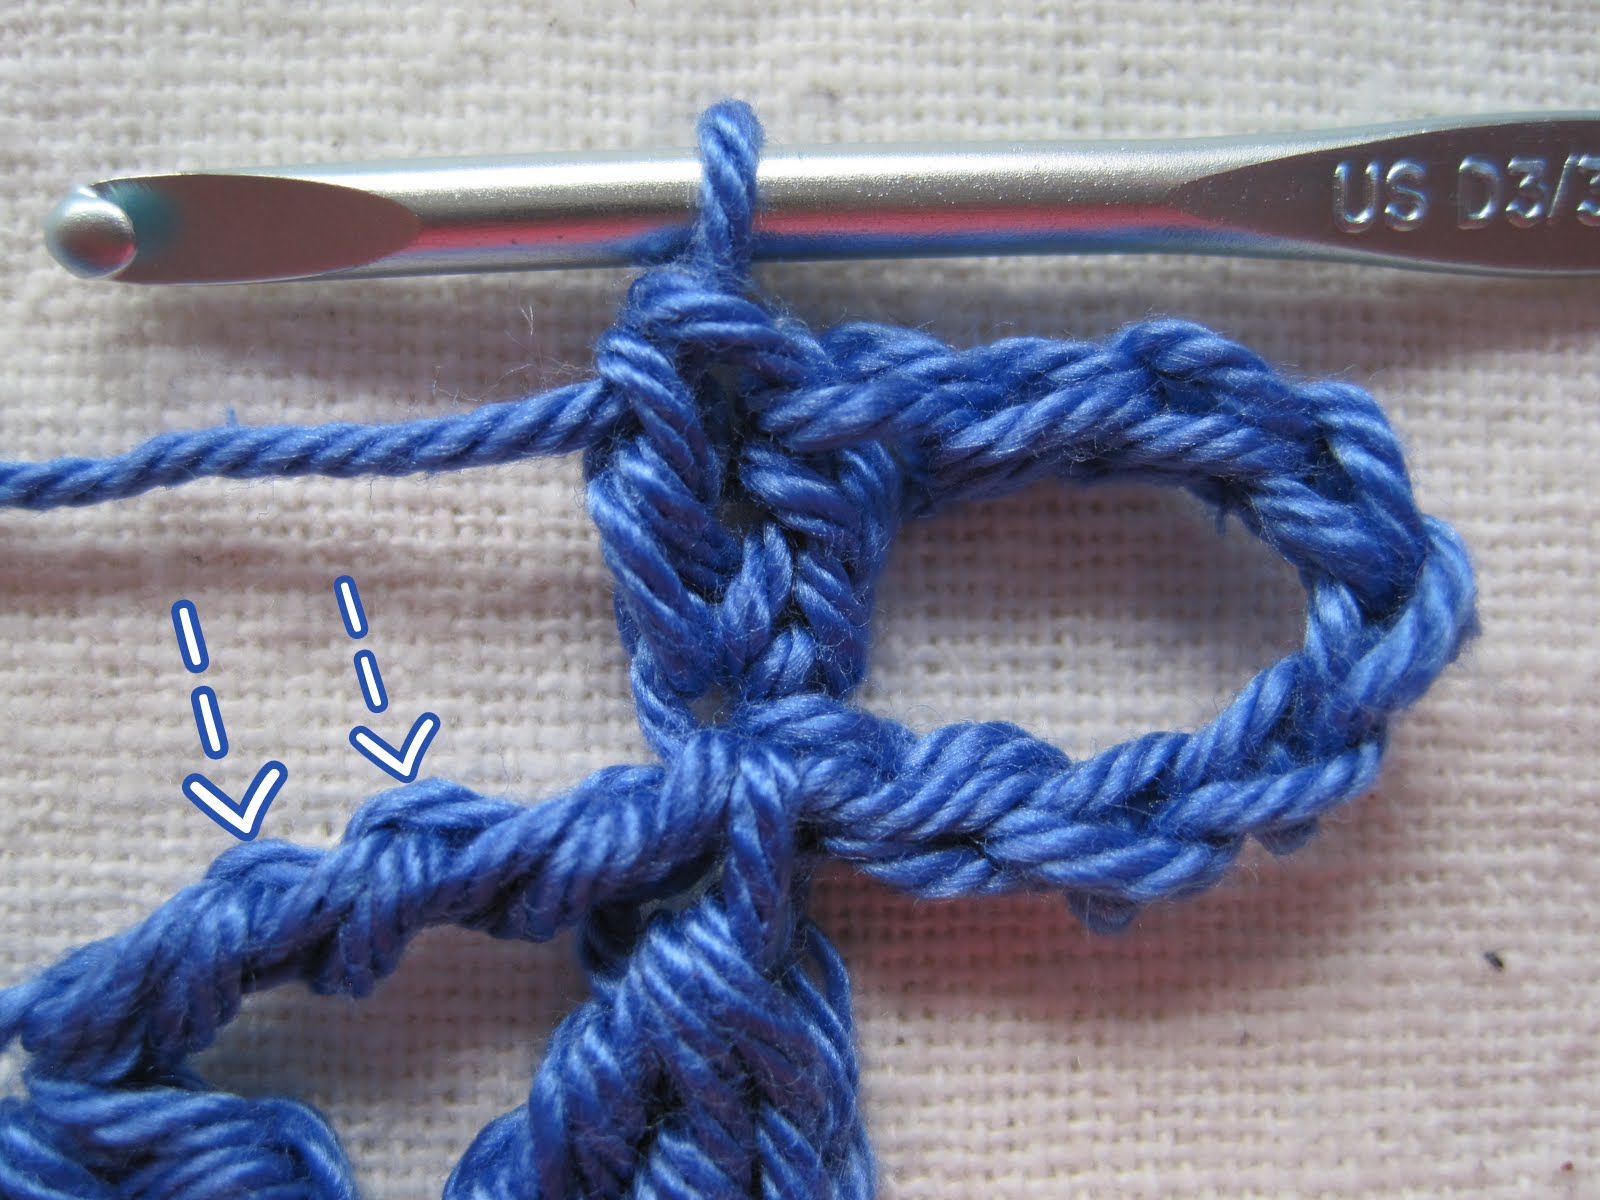
Chain 3, and treble crochet 2 together in the same back ridge space. Your upper right wing is now complete:

Double treble crochet in the starting back ridge space at the top of the upper left wing (see arrow in photo above).
To double treble crochet:
yarn over 3 times,
insert hook in starting back ridge space,
yarn over and pull up a loop,
yarn over and draw through 2 loops (4 times).
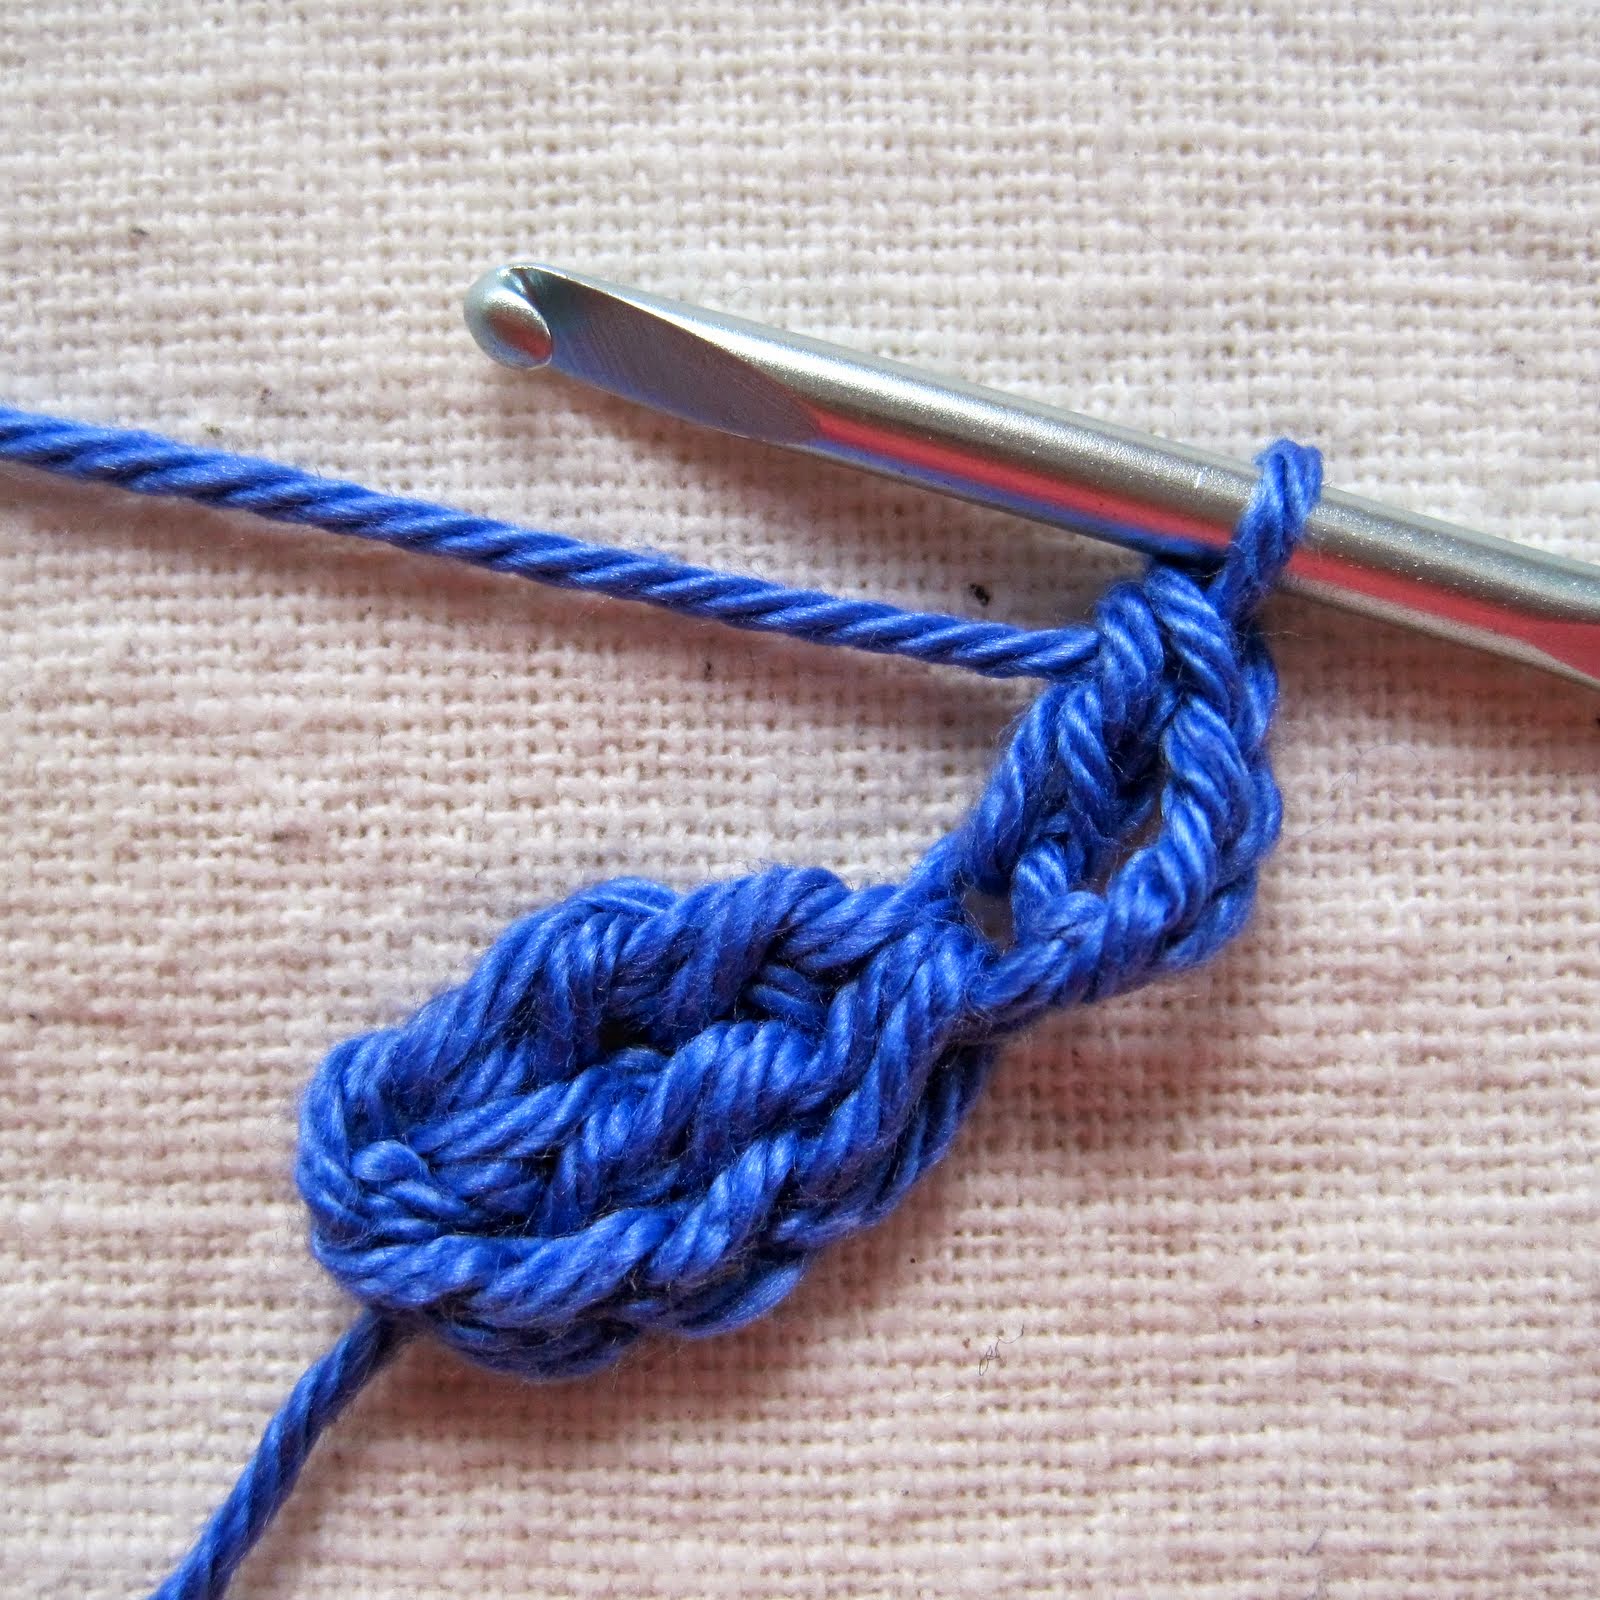
Your first Flutter-By is done!

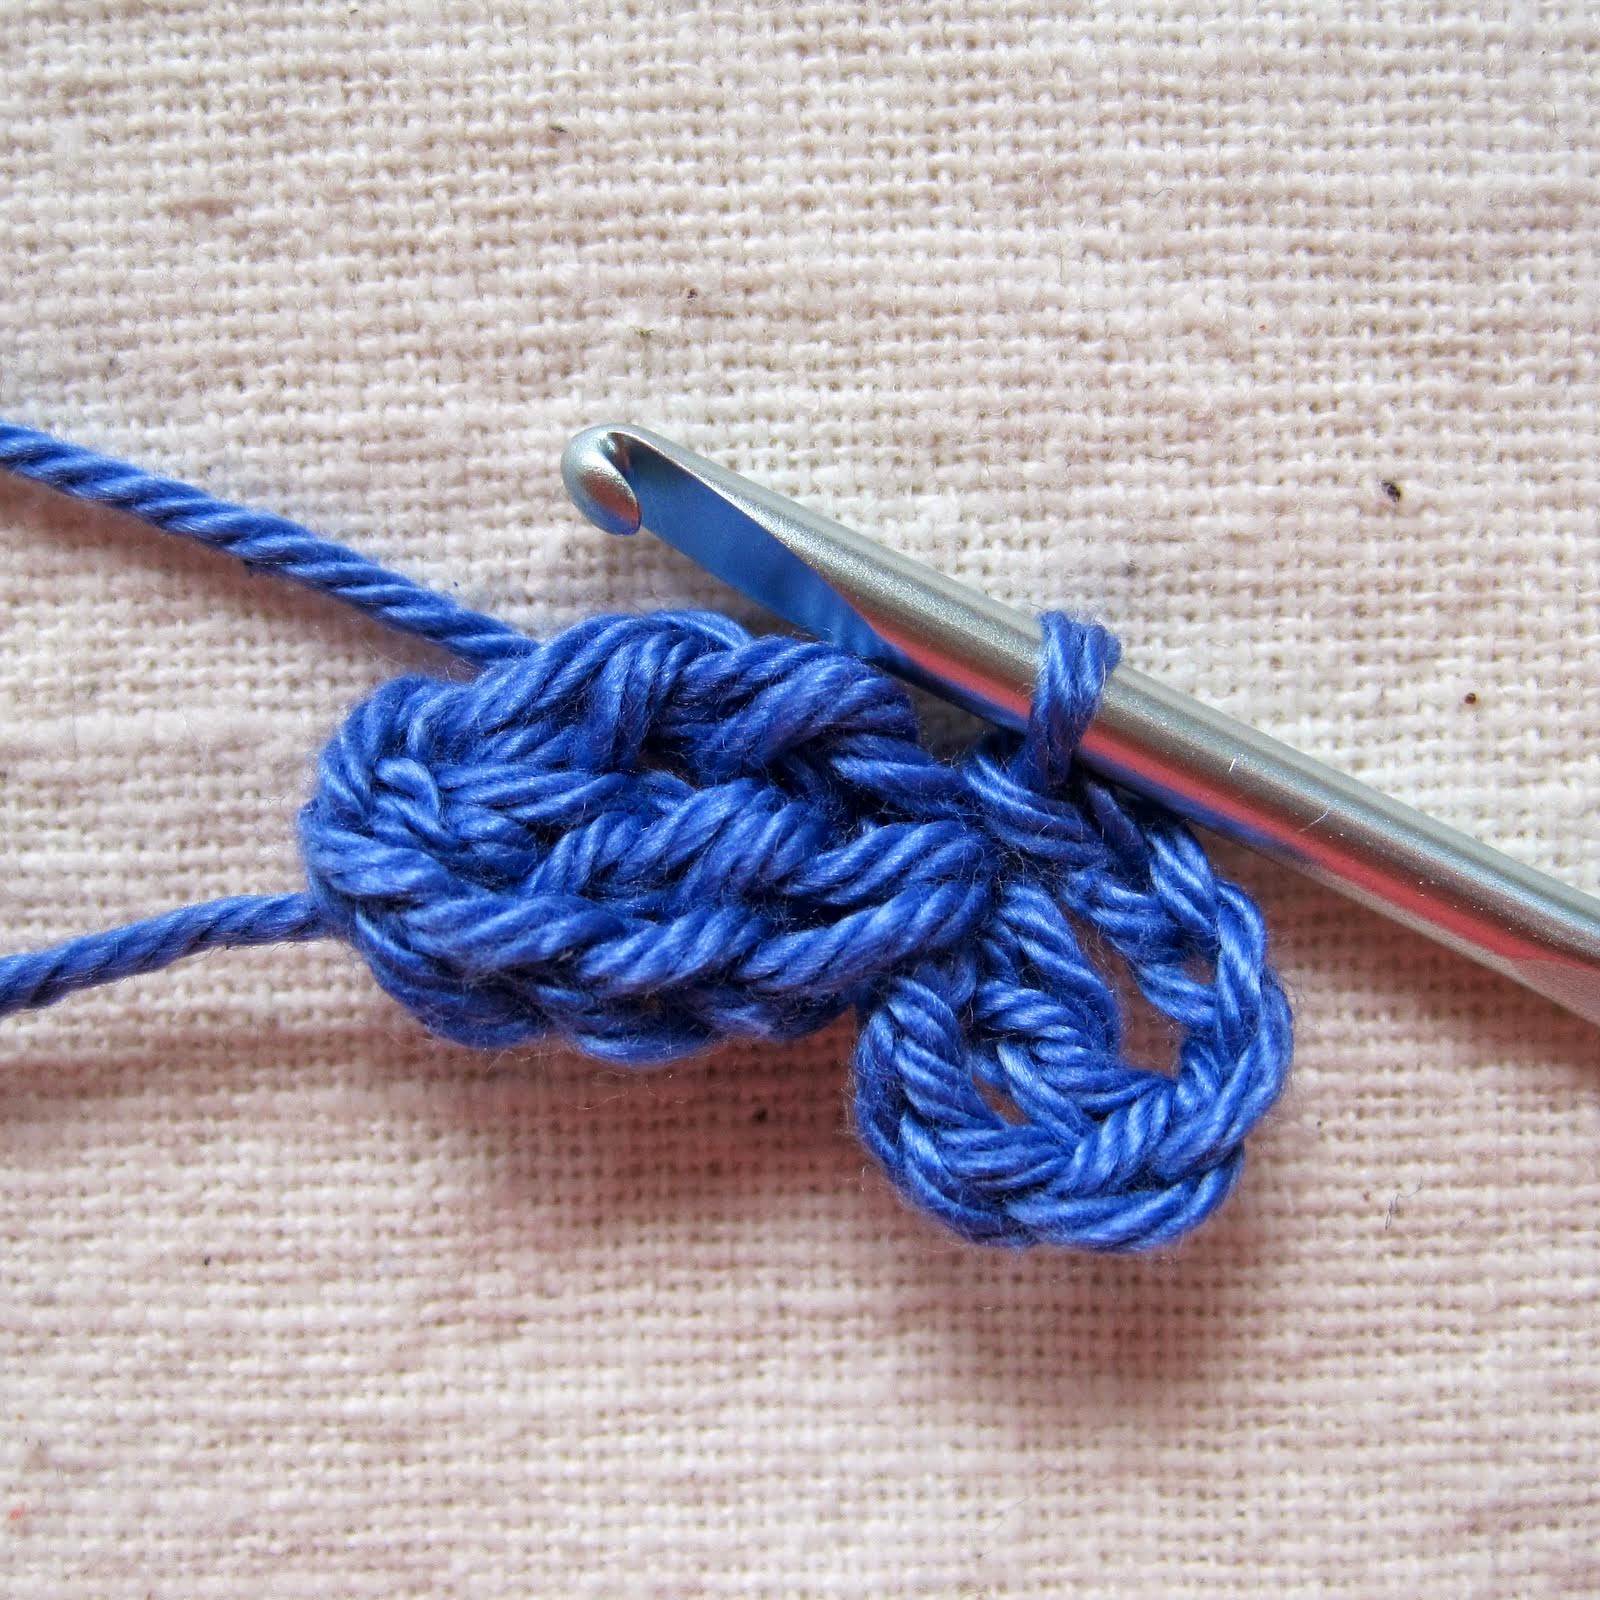
Repeat all the above steps to make another Flutter-By...
...and another...

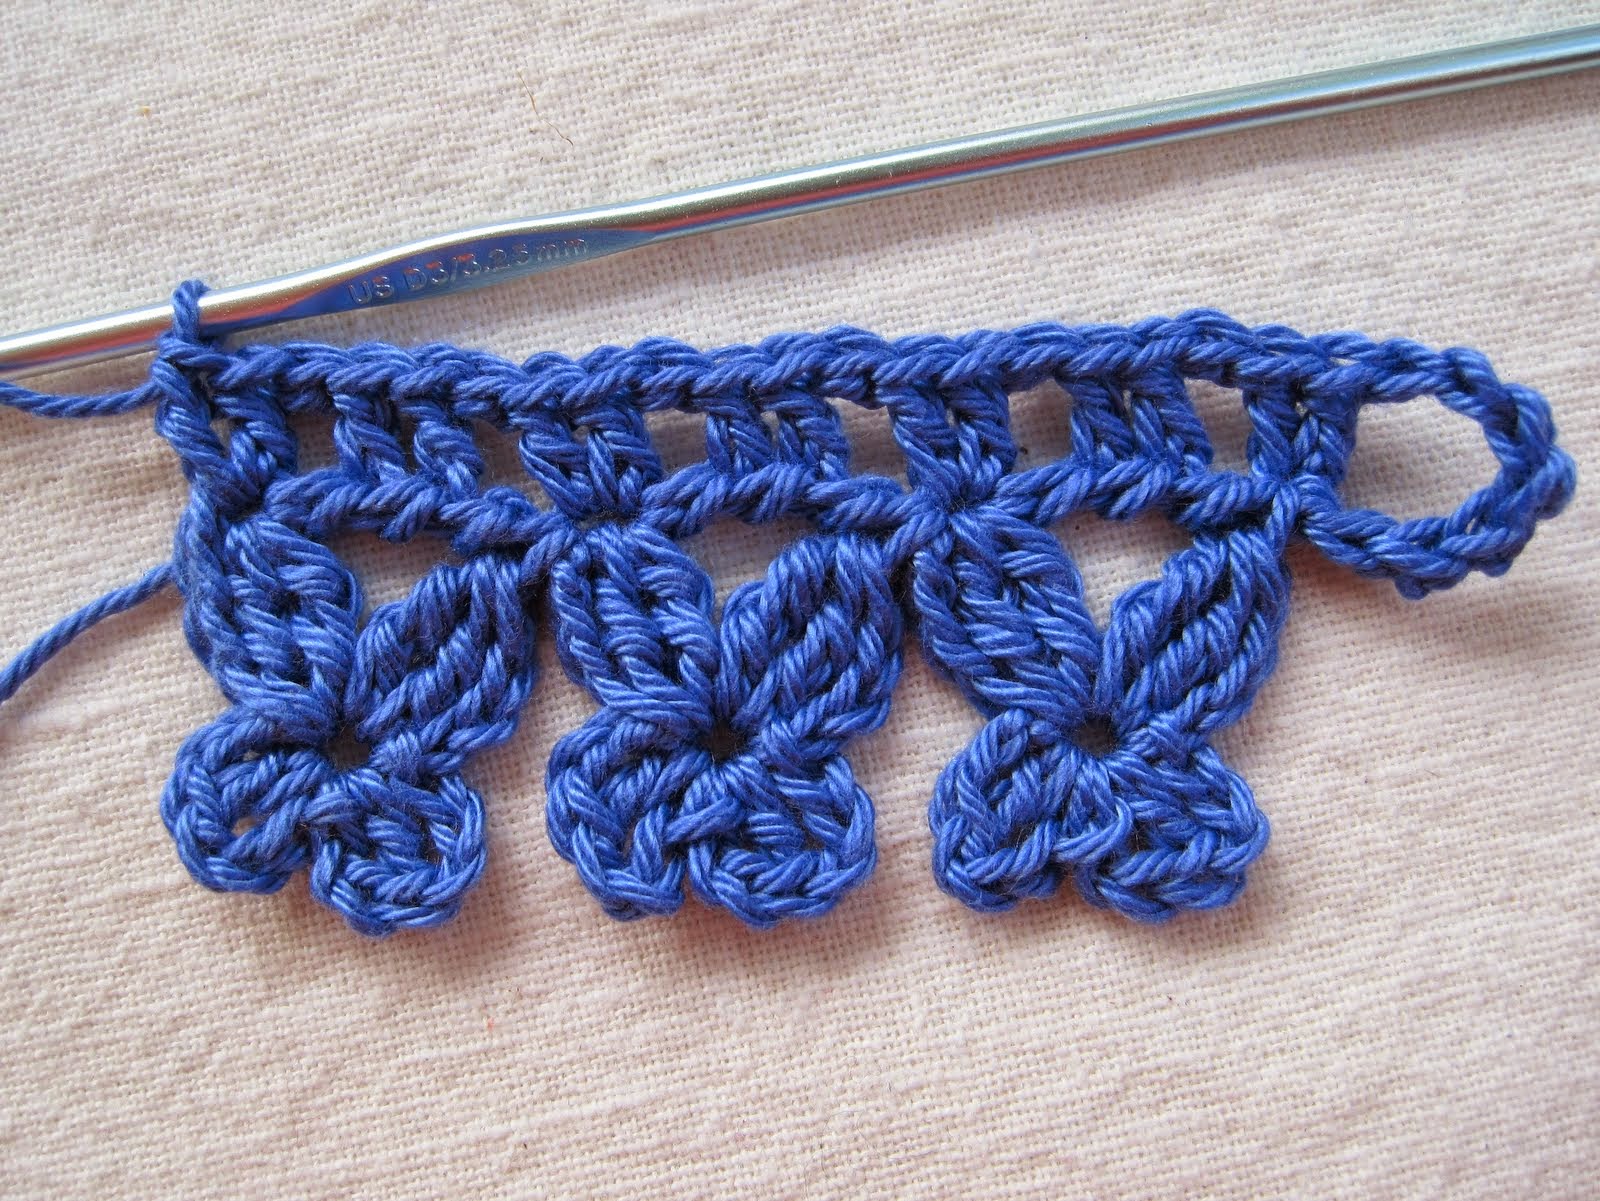
...until your tie is as long as you'd like. (My orange curtain ties are 12 Flutter-Bys long - about 18" after end loops are added).
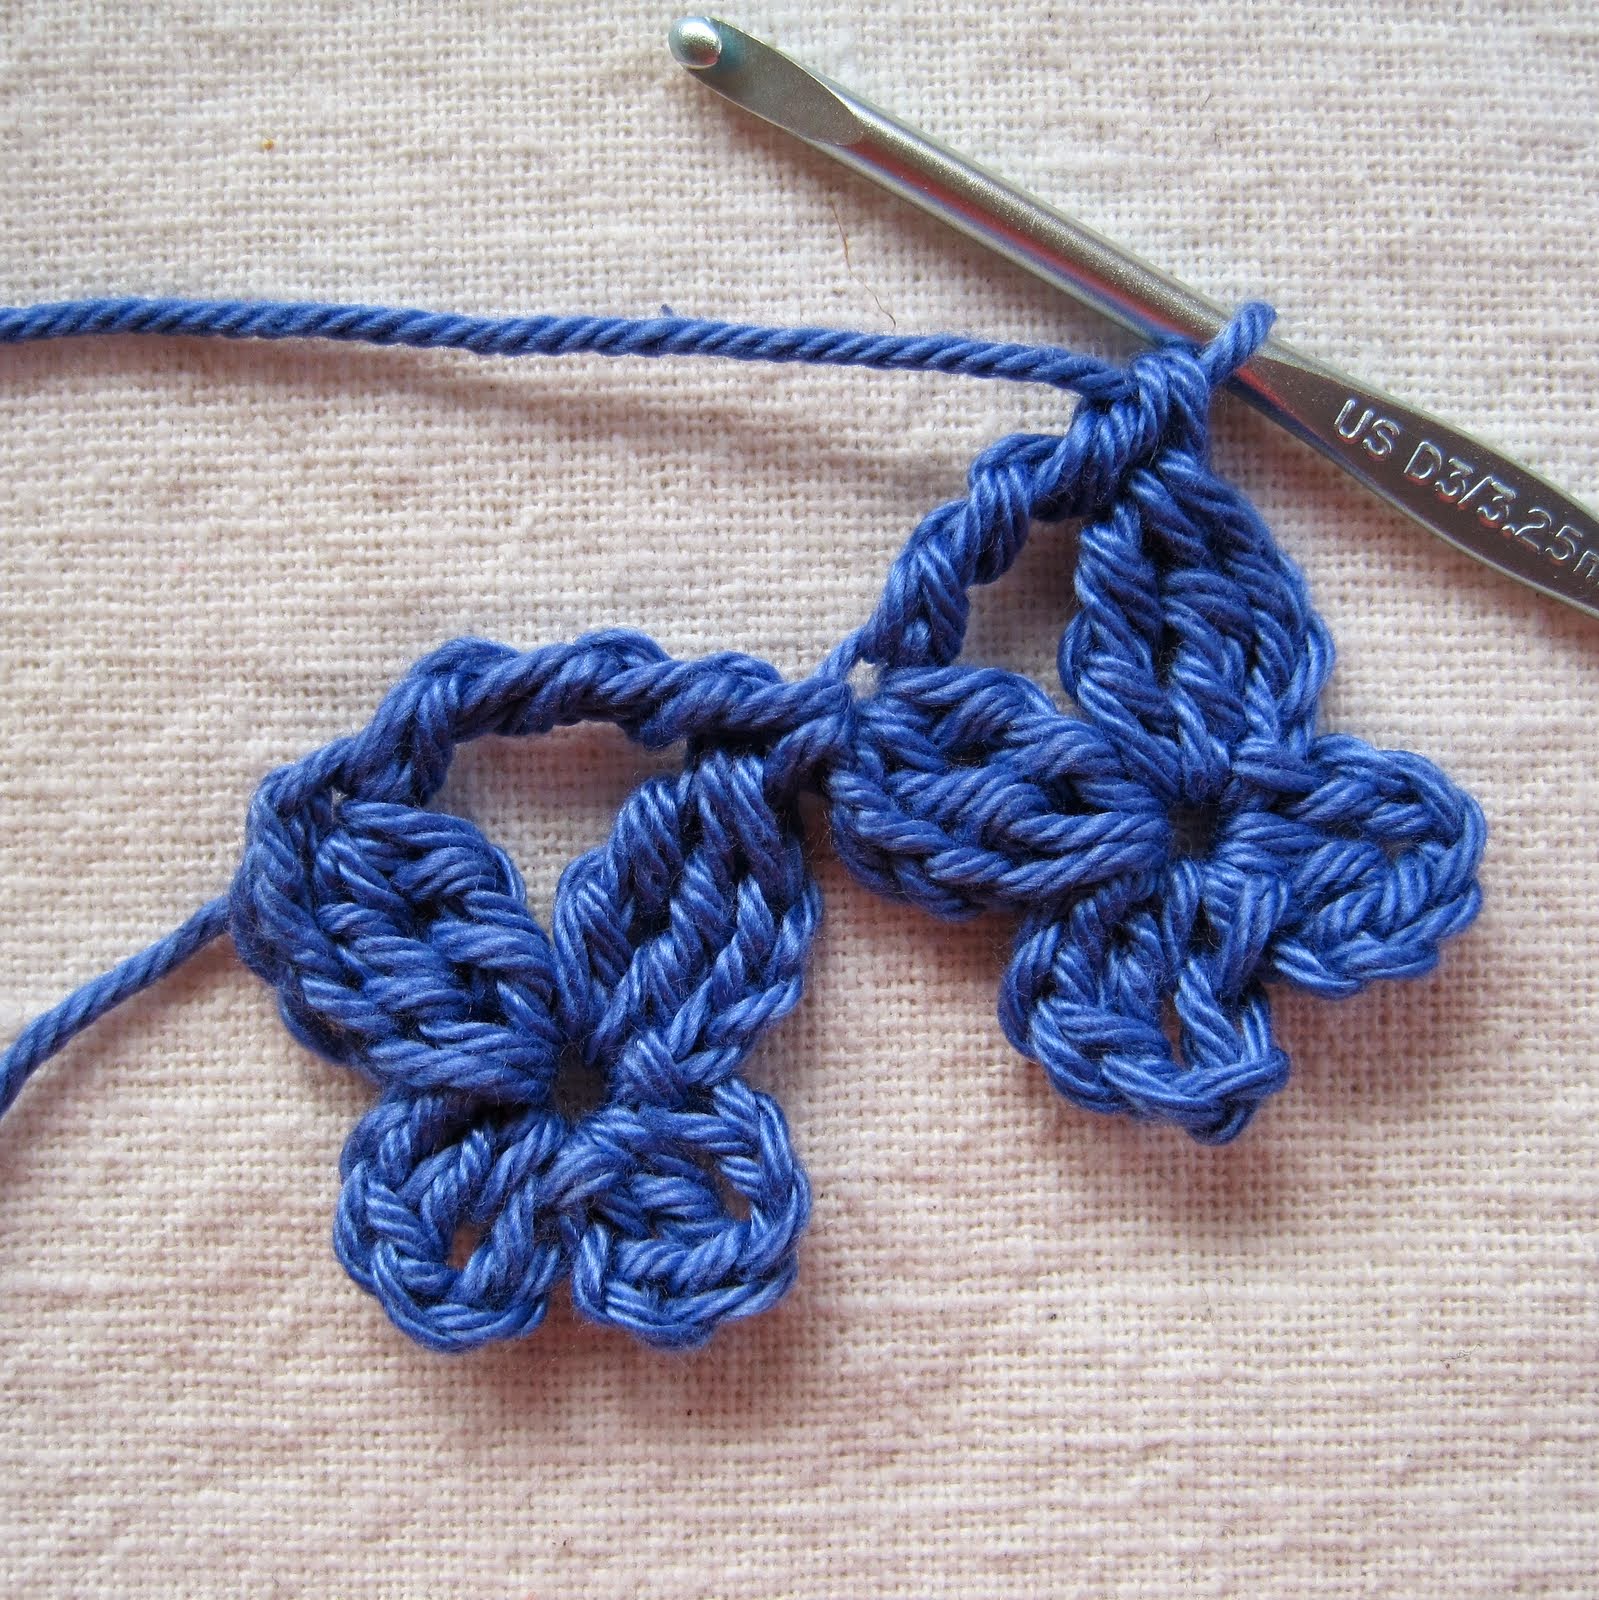
When you reach the desired length, it's time to loop around and start working back the other way. Do not turn your work over; keep the same side facing you at all times.

The arrows in the photo above show where your next stitches will go.
Double crochet 2 in the back ridge of the first Forward Loop Chain:
Now stop for a moment and look at the Double Treble that connects the top wings of the Flutter-By. In the center of it you will see 2 ridges (marked by arrows in the above photo.) Your next stitches will go there.
Forward Loop Chain 1, then double crochet in each of those 2 back ridges:
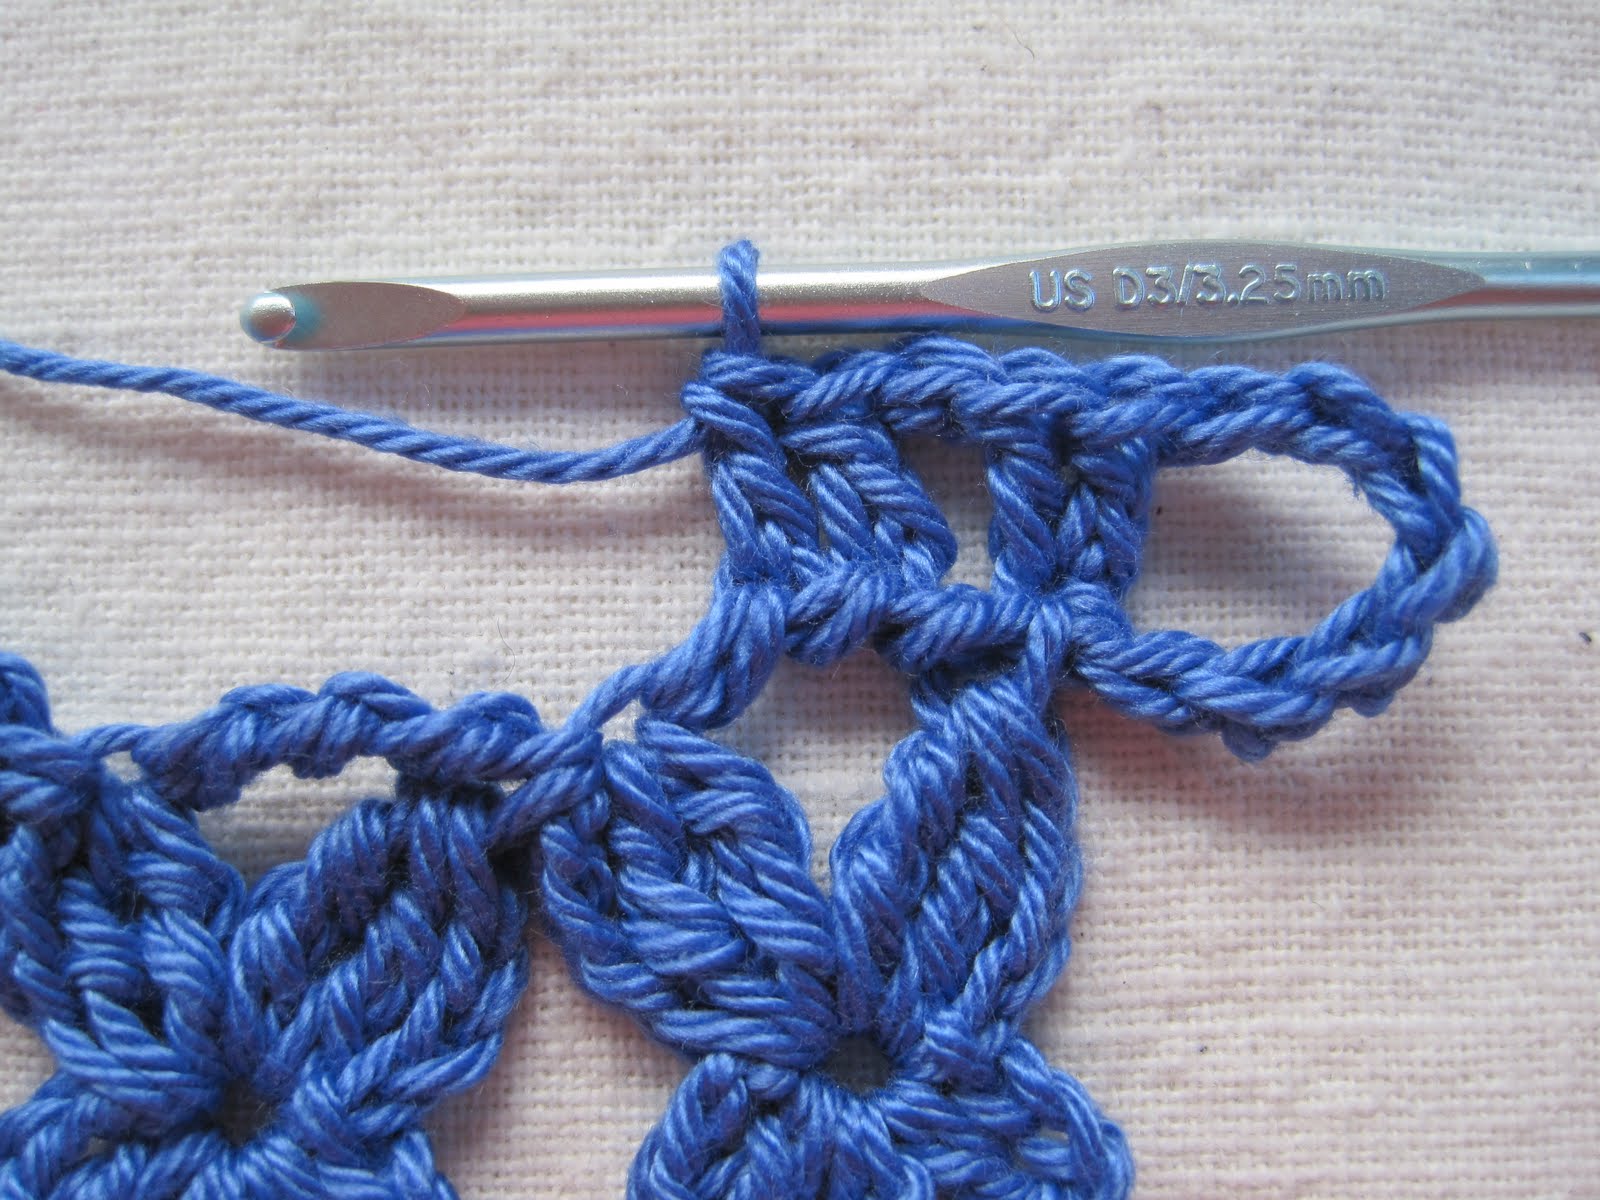
Forward Loop Chain 1, then double crochet 2 in the top space of the left upper wing:

Repeat this stitch pattern across the top of your curtain tie:
(Forward Loop Chain 1,
double crochet 1 in each of the 2 center back ridges of the next double treble crochet,
Forward Loop Chain 1,
double crochet 2 in the top of the next upper left wing.)
When you reach the other end...
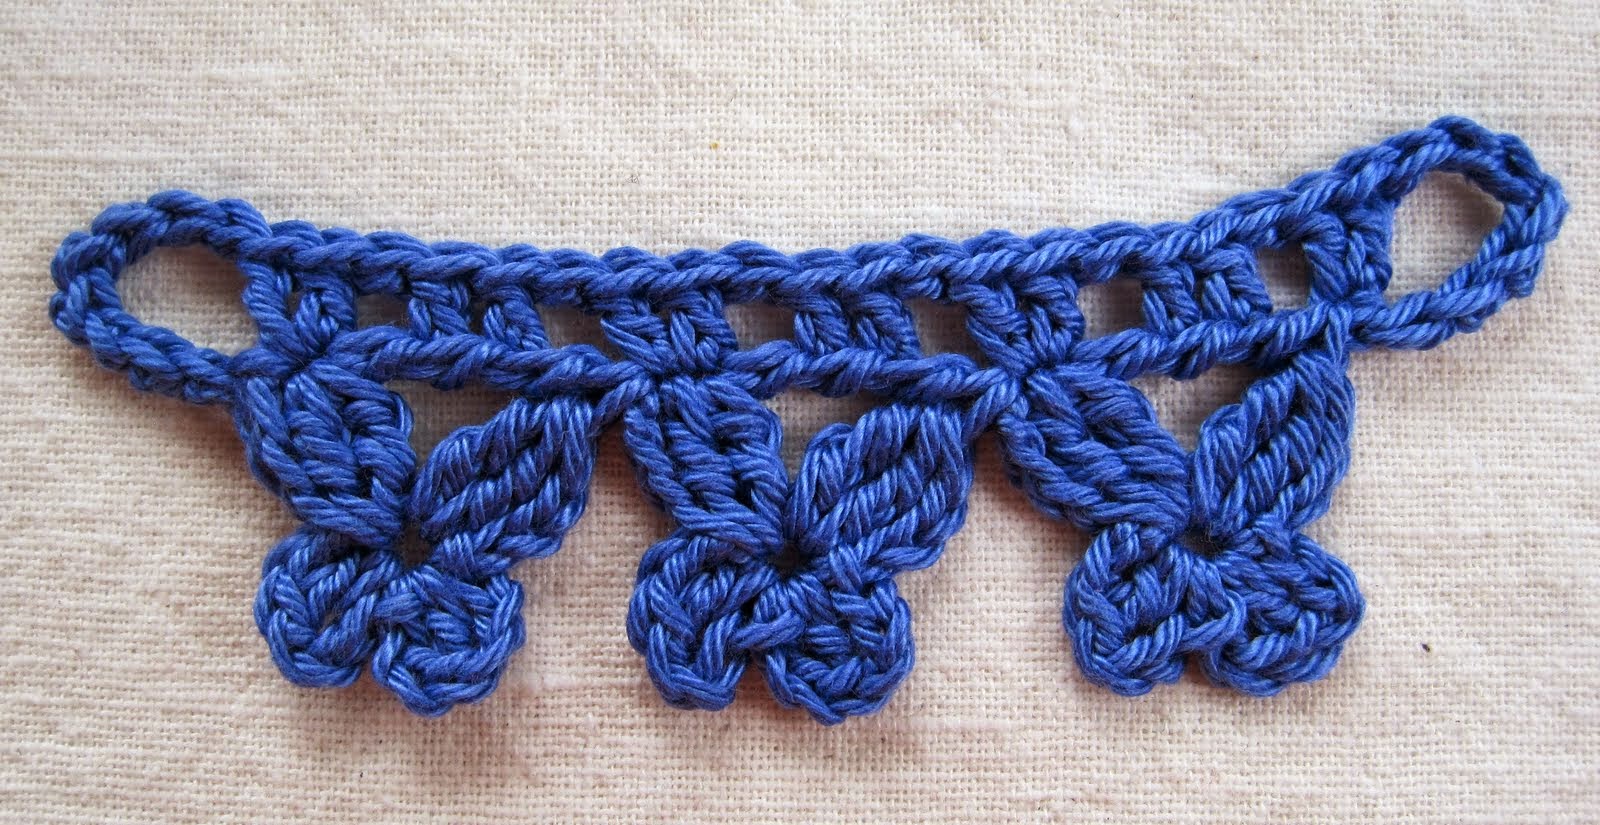
Forward Loop Chain 8, and connect with an Invisible Join to the first stitch of the first wing (see Special Stitches above for Invisible Join tutorial link; you may substitute a plain slip stitch join if you like.)

Weave in ends, and block your tie to open up the spaces and make the Flutter-Bys lie flat:
While the first tie is drying, whip up the next one.
Some other ideas for the Flutter-By pattern:
- Use as trim for towels or curtains. (A ribbon may be woven through the spaces along the top.)
- Use crochet thread and a smaller hook for a pretty necklace or bracelet. (Replace one of the end loops with a button.)
- Use a colour-changing worsted-weight or chunky yarn for a pretty bunting.
- Work shells or picots along the top (instead of double crochets).
- Change the Flutter-Bys into Violets by adding an extra wing (or petal) at the bottom center (ch 3, dc in back ridge sp, ch 3, sl st in same sp).
You may do whatever you like with the items you make from this pattern, but you may not sell the pattern or reproduce the text. (Links are always welcome.)
Thanks for viewing, and happy crocheting!
~ ~ ~ ~ ~ ~ ~ ~ ~ ~ ~ ~


